No products in the cart.
Return To Shop
How To Get The Weaver’s Needle In Black Myth Wukong
Vessels in Black Myth Wukong are hard items to come by, as they tend to require the player to complete side quests and uncover hidden secrets if you want to get your hands on them. Each of them are hidden within a secret area of each chapter, but they are worth seeking out, as each one offers a very helpful buff against the final boss of each chapter.
Some are more necessary than others, and when up against the Hundred-Eyed Daoist Master, not having the Weaver’s Needle is pretty much suicide. So, if you want to ace this fight and move on to chapter five, you’ll need to know how to get your hands on this rare item.
How to Reach Purple Cloud Mountain
First, we should explain that the 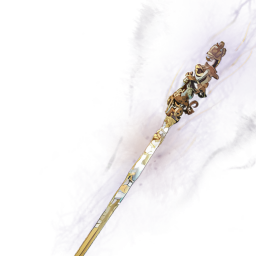 Weaver’s Needle can only be acquired if players manage to uncover the secret passage to Purple Cloud Mountain, which happens to be in a cave close to the Temple of Yellow Flowers Entrance. However, you must complete a series of fights before this area becomes accessible.
You will need to fight against the Venom Daoist twice throughout the chapter’s run before this secret area reveals itself.
The first fight is accessed via a path near the Upper Hollow Shrine. Whereas the second fight is located closest to the Temple Entrance Shrine.
First Fight Against The Venom Daoist
To find the Venom Daoist, you’ll want to begin at the Upper Hollow Shrine and follow the path behind the shrine and, to the left, nearest a flame torch. Following this path will lead you to an area with a broken wooden walkway allowing you to drop down below. Do this and then wander through an area with spider enemies and hanging web sacs.
If you continue along this path, you’ll come to an area with a large body of water and a meditation spot. Here, you will find the Pool of Shattered Jade Shrine. From there, through another room filled with Web Sac enemies, you’ll come to the area where you must fight the Venom Daoist.
The first fight against the Venom Daoist is relatively straightforward, and one that only serves as an appetizer before the main course later in the chapter, but if you are struggling to beat him, here are a few tips that may help you through the fight:

- Don’t waste your spells and heavy attacks on the Old Coocon portion of the fight. You are in no danger during this phase.
- Watch out for his dash attack, similar to the
 Red Tides heavy attack. It’s the only dangerous attack they have
 - Spam all your spells and then enter your transformation; chances are they won’t even land a hit on you.
Second Fight Against The Venom Daoist
After you clear this fight, you’ll need to progress through the chapter, defeating bosses like Violet Spider and Zhu Bajie on your way to the Temple of Yellow Flowers. This is where you will fight the chapters end-boss, the Hundred Eyed Daoist.
But before that, you’ll want to begin from the Temple Entrance and follow the path up the steps.
Then you’ll want to follow the path to the left across the body of water, and along this path until you reach a poison lizard enemy. From here, instead of going left past the guards, go right and along this path instead.
Eventually, you will come to a fork that allows you to turn left and down a slope into a cave. This is where you will find the Venom Daoist for the second time.
If you reach a hut with a series of Mushrooms to gather, you’ve gone too far, but you can fight the 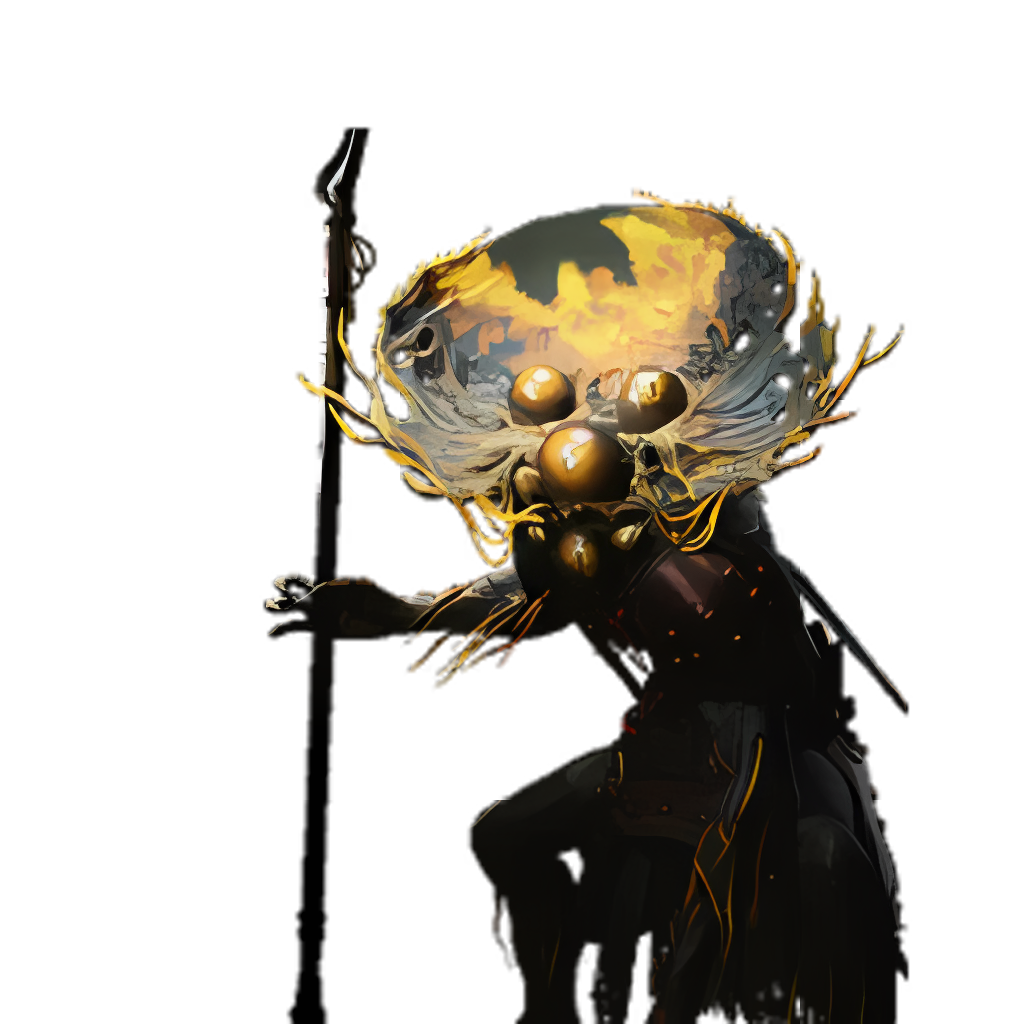 Fungiwoman here if you wish.
This is a tough two-phase fight, but it can be done in one try if you hit the ground running in the first stage. Here are some tips for beating the Venom Daoist this time around:

- The first phase is more or less a repeat of the last fight. So try to conserve your mana and transformation for the second phase.
- Most of their attacks are fast combos, followed by a moment of recovery. So allow them to attack, and then counter when you evade all their attacks.
- In the second phase, use your spells to your advantage, and don’t attack during their intense and relentless combos.
- Stay close, as their dash attacks are much harder to anticipate than their melee combos.
When you defeat the Venom Daoist, you’ll then gain access to Purple Cloud Mountain, and in this secret area, you’ll need to hunt down the boss that holds the Weaver’s Needle.
Duskveil Location & How To Beat Them
Once in the Purple Cloud Mountain region, you can now seek out the Duskveil. A horned beast that offers a unique two-phase fight much harder than anything the Venom Daoist had in store for you.
To find this boss, you’ll begin from the secret area’s entrance and proceed until you reach the Valley of Blooms Shrine.
From there, you’ll want to head along the path, heading straight and never deviating. This will take you past a series of archer enemies and a few tree giant enemies, until you reach the Petalfall Hamlet Shrine.
Then all you have to do is head along this path, past the NPC that asks you to take down his former friends, and you’ll be stood face to face with the Duskveil.
As mentioned, this is a tricky fight, but if you stay calm and use all the tools in your arsenal, you’ll be fine. Here are some helpful tips to ensure you defeat the Duskveil:

- Their hitbox is huge, so getting close and under their legs when possible can be helpful, allowing you to stay on the offensive for longer periods.
- Much like the second Venom Daoist fight, you should conserve your mana and transformation until the second phase
- In the second phase,
 Cloud Step is your friend to avoid projectiles and AOE attacks.
 - The
 Ebon Flow transformation is useful due to the Duskveil’s slow but powerful attack, meaning you’ll be able to land hits consistently without being staggered.
Rewards For Defeating Duskveil
If you manage to defeat the Duskveil, you will gain the following rewards for your efforts:
The Weaver’s Needle is the most important thing here, as this item will allow you to break the Hundred-Eyed Daoist out of their extremely tough lightning phase and offers decent, consistent damage while keeping a distance from all other enemies.
However, the Duskveil’s Horn and Kun Steel are valuable resources, with the former giving you the ability to craft the 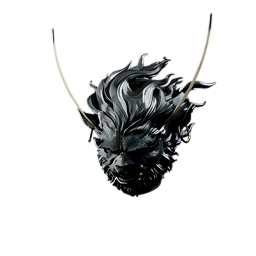 Iron Horned Helm . Plus, the Double-Combed Rooster Blood Soak is a great option to bolster your
 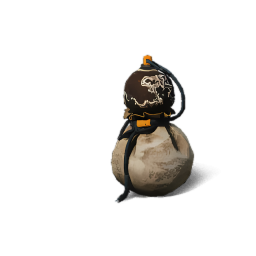 Healing Gourd uses. So, these added bonuses are more than welcome.


About author
Related posts

Key Takeaways Far Cry 3 is arguably the best game in the series and perfect for fans of open-world shooters. Rainbow Six Siege offers a... Continue reading

The Lost Isles expansion just released for LEGO Fortnite, bringing the new Tropical Treasures Battle Pass and quests alongside it. We currently have access to... Continue reading

One of the quests for the current Battle Pass in LEGO Fortnite is to “Visit a Llama Island Head”, which is easier said than done.... Continue reading

If you want to complete the current battle pass in LEGO Fortnite, you’ll need to upgrade or interact with a Level Two NaNa Village. That... Continue reading

BattleState Games has published its preliminary roadmap for Escape From Tarkov and Escape From Tarkov: Arena until the end of 2024. The biggest item on... Continue reading
Add comment